Create commercial media records
Let's start with an example.
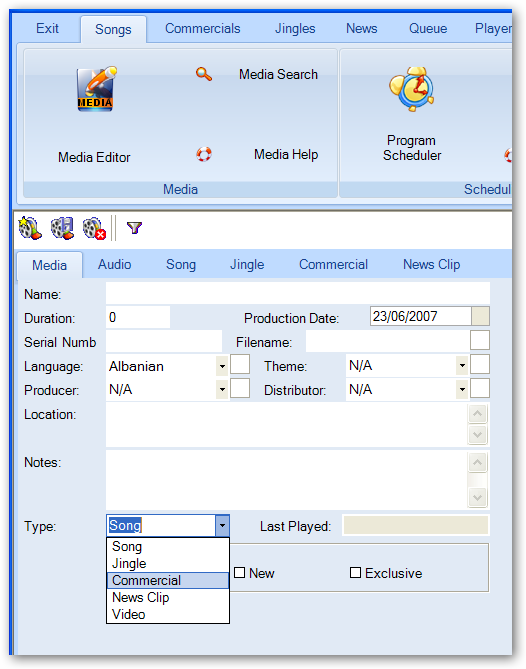
Create a new commercial media record similar to the snapshot below.

It is important that you set the type of the media record to "Commercial".
We will not be concerned at this stage about costs of the commercial, but if you want to set the commercial category and cost, select he commercial sub tab next to the Jingle tab and modify the values there to your requirements.

Create Commercial Spot Program Elements
After we create the commercial media record and link it to an audio file, we have to assign commercial spots within our programs. To do this, you will have to follow the standard programming steps (see scheduling programs), except this time you will select the program element type as commercial.
Creating one at a time
To create one commercial spot or break at a time, select the Grid Editor and then select the Grids sub- tab.
Select the Grid you wish to insert the commercial break in from the list and then click on the Schedule tab.
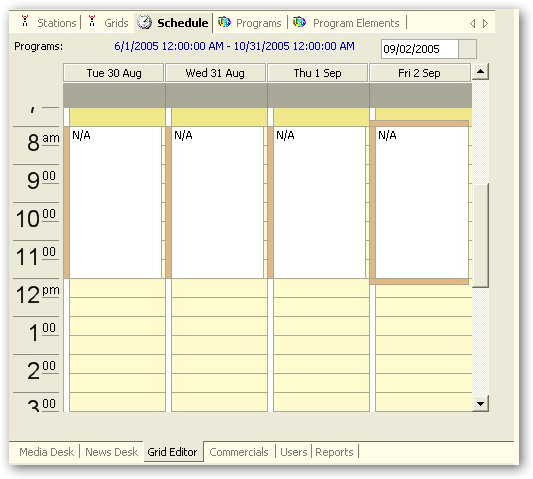
If you have a schedule defined, you can use it by selecting it or you can create a new schedule, select it and then move on to select the Programs tab.
If you already have a program defined, �you can insert the commercial spot as a program element. If a program is not defined at the specified time, you have to create one and then select the Program Elements tab. I personally prefer to have a dedicated commercial program rather than embed the commercial break as a program element within a general program. The choice is left to you.
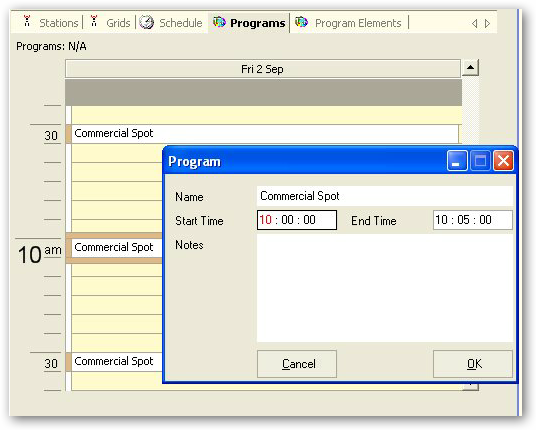
As you can see in the image above, my program is defined as a commercial spot starting at 10 AM and ending at 10:05 AM. The commercial spot or break defined can have any length. Having all spot commercials for all station feeds at that time with the same time span, facilitates the network switching of commercials when broadcasting the same programs to multiple radio towers but having different commercial break content.
Next we move on to creating a program element for this commercial spot program (see creating program elements for more on how to create a program element).
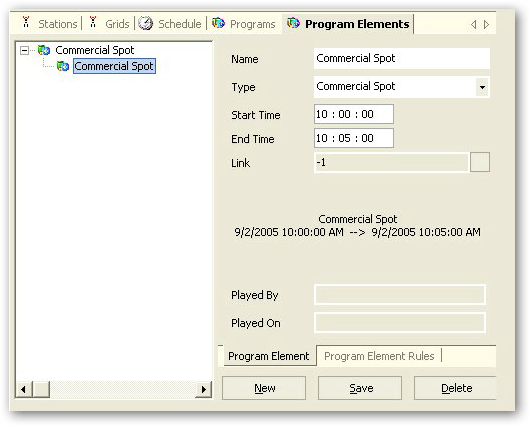
In this example, you see that the program element covers the whole duration of the program, is of type commercial spot and has no links.
System generated commercial spots
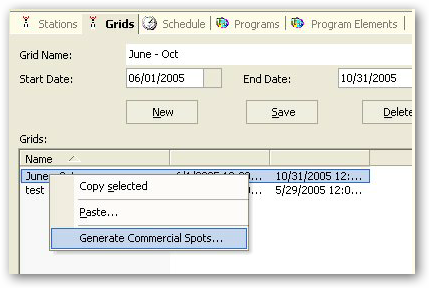
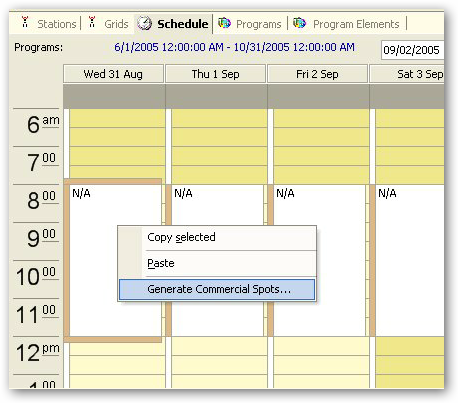
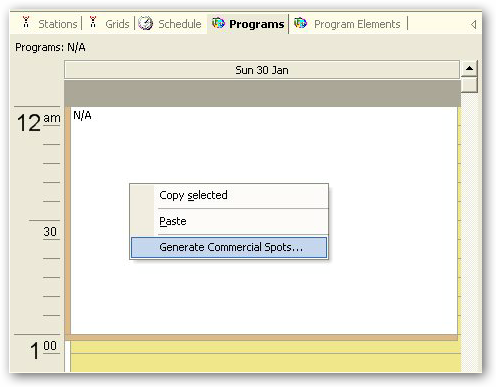
You can ask the system to generate commercial spots for you at specified intervals, with a defined time span and within a grid, schedule, or program.
This is achieved by selecting a Grid, a Schedule, or a Program and then right clicking to get the context menu. From the context menu, select
For Grids
For Schedules
For Programs
Selecting this option from the Schedule tab will pop up the Generate Commercial Spots dialog.
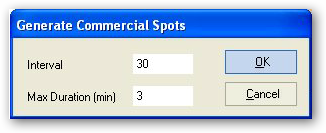
Adjust the values to your requirements and click OK.
To see the results of the action, select the Programs tab.
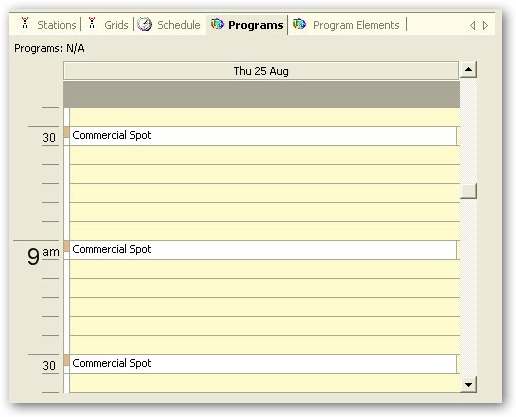
As you can see, the system created the programs for you with the default name of Commercial Spot.
Select any of the newly created commercial spot programs and then select the Program Elements tab.
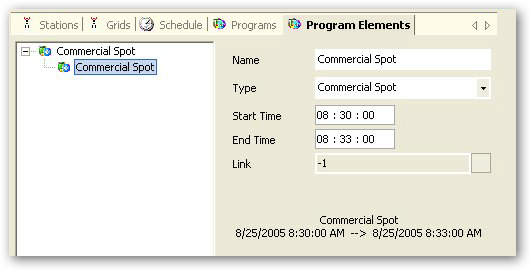
As you can see, the system has created a program element for each of the created commercial spot programs with the desired duration.
Scheduling Commercials
Now that we have created the commercial media record and have defined the commercial spot, it is time for us to define the contents of the commercial spot.
To do that, select the Commercials menu and then click on Commercial Editor.
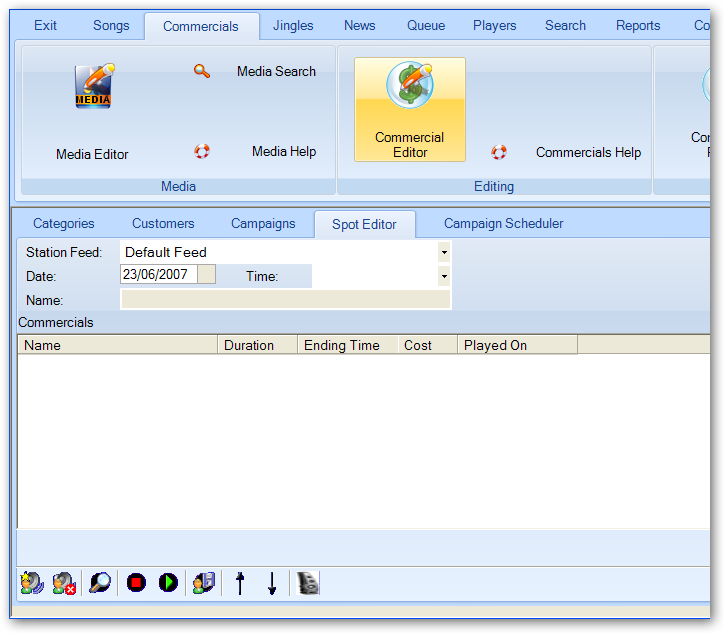
Select the date you want and then select time for the commercial spot or break. If there are ads already defined, they will show up; otherwise the Commercials list will be empty.
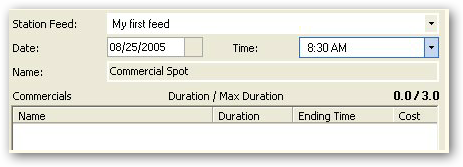
As you can see from the picture above, the selected commercial spot is empty.
To start adding commercials, you will have to click on the new customer commercial button.
Before we do that, let's learn more about the available buttons on this module.
 New / Add commercial
 Delete selected commercial
![]() Search for a commercial break or spot (not implemented in current version)
Search for a commercial break or spot (not implemented in current version)
![]() Stop preview (not implemented in current version)
Stop preview (not implemented in current version)
![]() Preview spot (not implemented in current version)
Preview spot (not implemented in current version)
![]() Saves the current commercial break
Saves the current commercial break
![]() Moves selected commercial up by one
Moves selected commercial up by one
![]() Moves selected commercial down by one
Moves selected commercial down by one
 Allows you to switch between the main audio device and secondary audio device�(not implemented in current version)
Adding commercials to the list
The system allows you to start adding commercials to the list in two ways:
1. By clicking on the New / Add commercial button 
2. By highlighting the list (click on it once) and then using the Enter key on your keyboard
When the commercial selection dialog box pops up, you can start typing the name of the commercial to highlight it (using only your keyboard) or you can highlight the desired commercial by using your mouse.
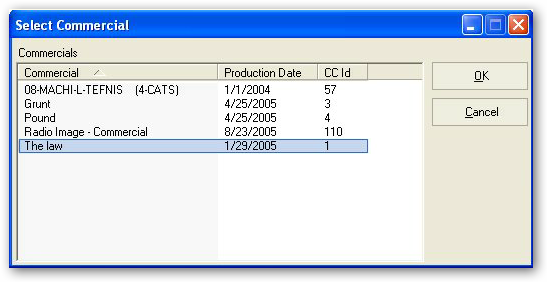
If you accept the selection by clicking on the OK button, the dialog box will close. However, if you accept the selection by pressing the Enter key on your keyboard, the dialog box will flash and you will be able to start typing the second commercial's name to select it and add it to the list.
If you are using the Enter key to accept commercials, use the Escape key on your keyboard to close the commercial selection dialog box.
After entering a few commercials, our list looks as follows:
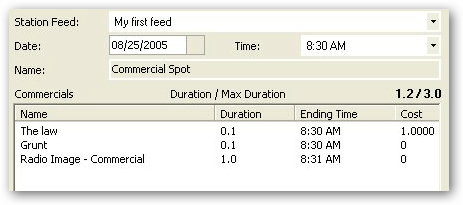
The system will calculate the duration of each commercial then add them all together and display it in the�header of the list.
As we have said before, the system does not prohibit you from overflowing the allowed time for the ad spot. It will only display the overflow for you to make the decision on whether to keep it or fill the space with a generic clip.
Click now on the Save button to persist the changes  .
.
Remember: Save your work when you're done. If you do not save your work, it will be lost.
Copyright � 2011, Emile Bassil
Created with the Freeware Edition of HelpNDoc: Easily create CHM Help documents